Getting photos from a camera to Lightroom mobile on the iPad can be important for travel bloggers or anyone wanting to edit the photos. You may want to smarten them up for Facebook or Instagram, or perhaps you are blogging from the road.
It is something I have done for quite a while. In fact, the first time I did it was back in 2012, on our New Zealand honeymoon, but more successfully during our 2013 and 2016 USA Road Trips.
However, I always stumbled around the process. So, I thought I would try and document getting photos from a camera to Lightroom mobile on the iPad, and share it with you.
This process uses the [amazon_textlink asin=’B06XCJ9FS2′ text=’Apple Lightning to SD Card Reader’ template=’ProductLink’ store=’richchubb-21′ marketplace=’UK’ link_id=’2c6f4fbf-0e9c-11e9-8d83-d7a3d980cfc1′] to get the photos from the memory card to the iPad. Of course, if your camera has the ability to transmit wirelessly, you can ignore the first few steps and go straight to point number 2.
1 – Getting photos from camera to Lightroom mobile on the iPad
The first thing to do when getting photos from a camera to Lightroom mobile on the iPad is to open the Photos app.
Next, plug the card reader with SD card inserted, into the Lightning port of the iPad. This should then show all the images on the memory card. Scroll through the images, and choose the photos you want to import.
In the top left, choose where you want to import them too.
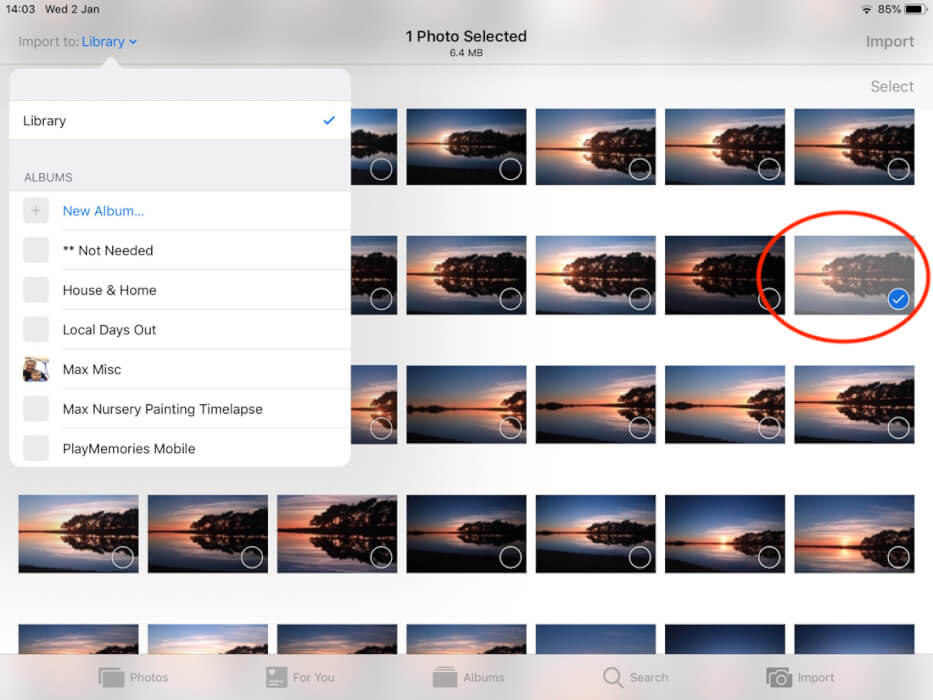
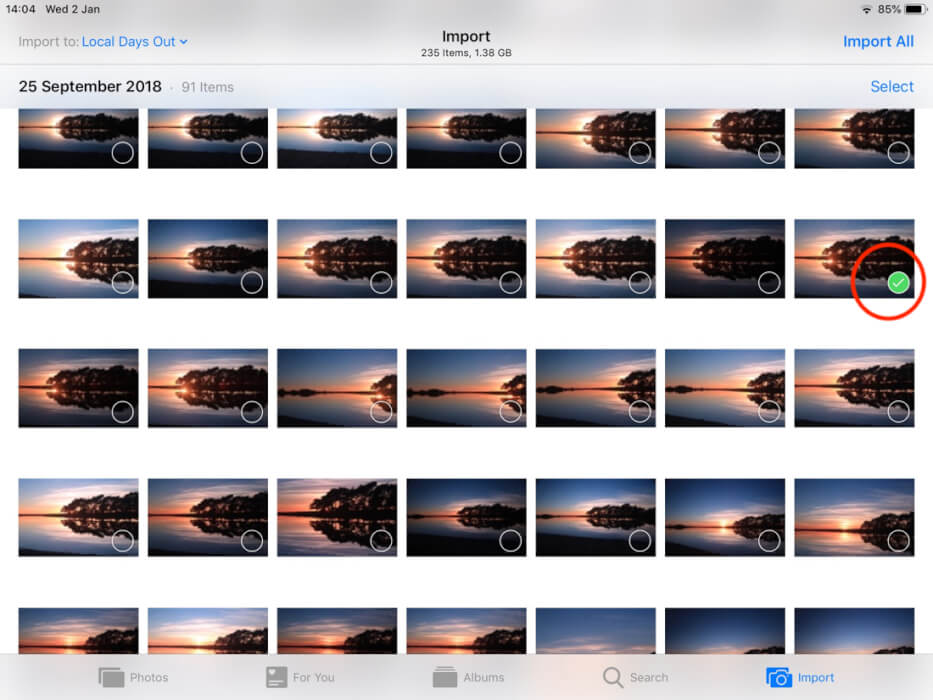
In the top right corner, click on Import, and then chose if you want to Import All or Import Selected. For this example, we are just importing the one image so I picked Import Selected.

This will now add the image to the album you picked, and you will see a Green circle, ticked, confirming the import.
2 – Getting the photographs from the Camera Roll into Lightroom
There is the ability to set up Lightroom to Auto Import as soon as things are added to the iPad camera roll. If you have iCloud photos set up and you have Auto Import turned on, then by default, all new iPhone shots will import into Lightroom. So you end up having all your iPhone snaps added to your iPad Lightroom catalogue.
This is ok if you want every single photograph to go into Lightroom. But if you only want the best ones to edit etc, then I would suggest keeping this turned off.
Unless of course, you want 20 photos of your cat jumping off the back of the sofa (or whatever else you may snap away at!) Anyway, back to the subject in hand!
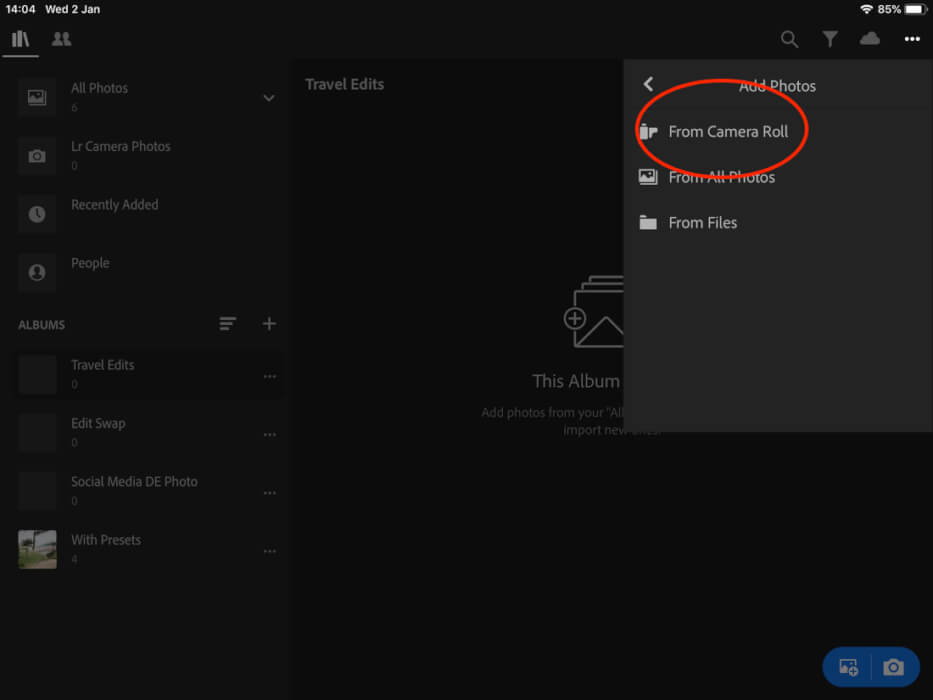
Tap on the dots in the top right, then tap on Add Photos.
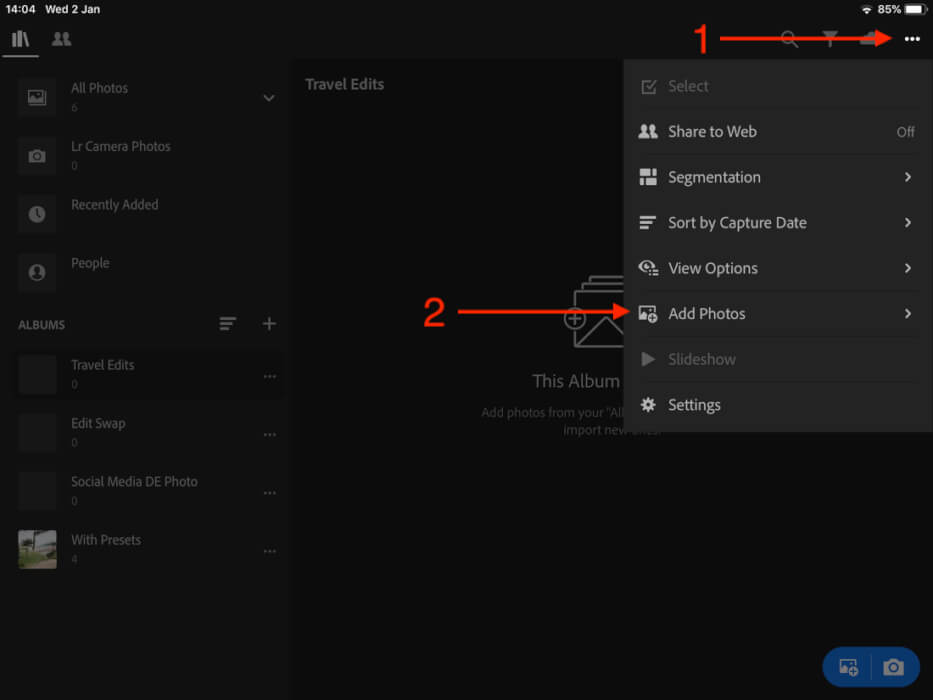
Pick where you want to import from, in this instance, we want to import from the camera roll.
In the below options, you also have:
From all Photos – That will show you all the photos already in Lightroom
From File – This will show all photos from the iCloud Files app
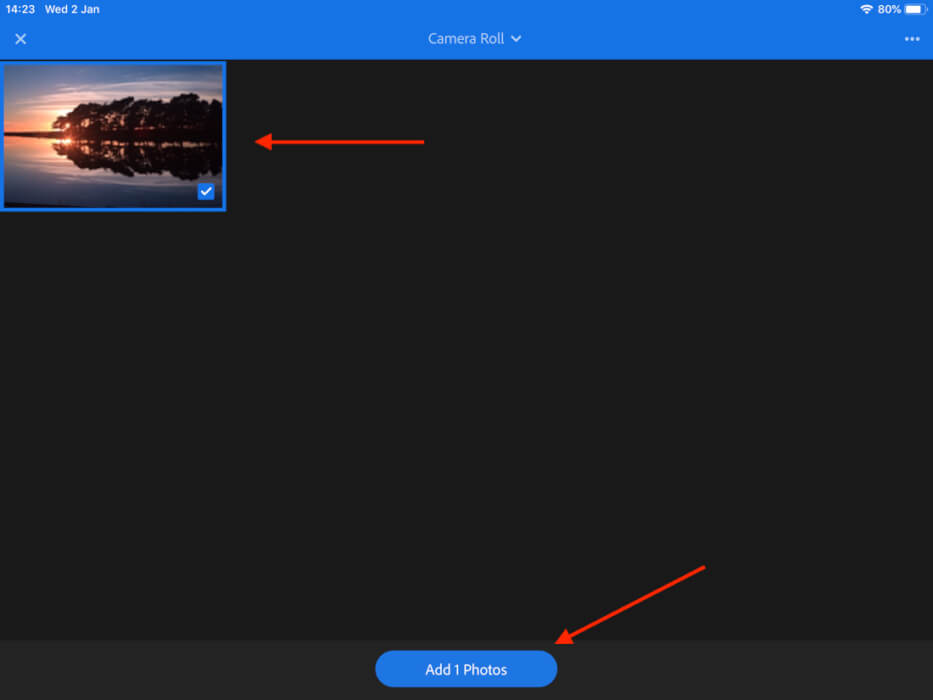
Find the photo you want to import, tap on it, and then tap on Add Photos at the bottom. This will bring the selected photographs into Lightroom.
3 – Editing and exporting Back to Camera Roll
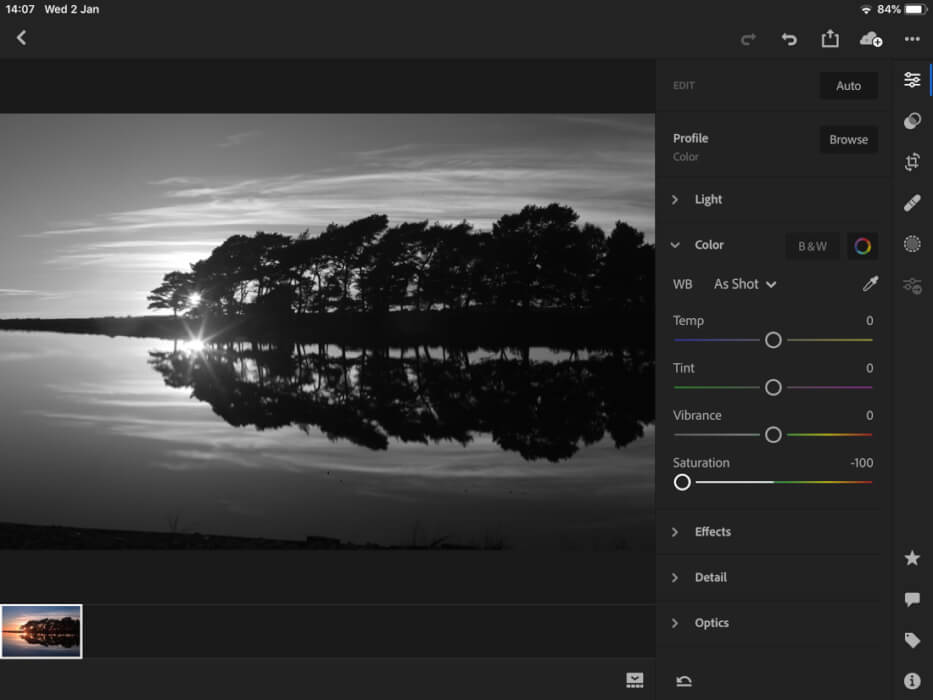
Once into Lightroom, you can then perform any edits you want to.
All I have done here is just convert the image to B&W so you can see it is an edited image I am working with.
The next step is to get this edited image saved out to the camera roll so you can share to Social Media, your Blog, or just keep in your library for future.
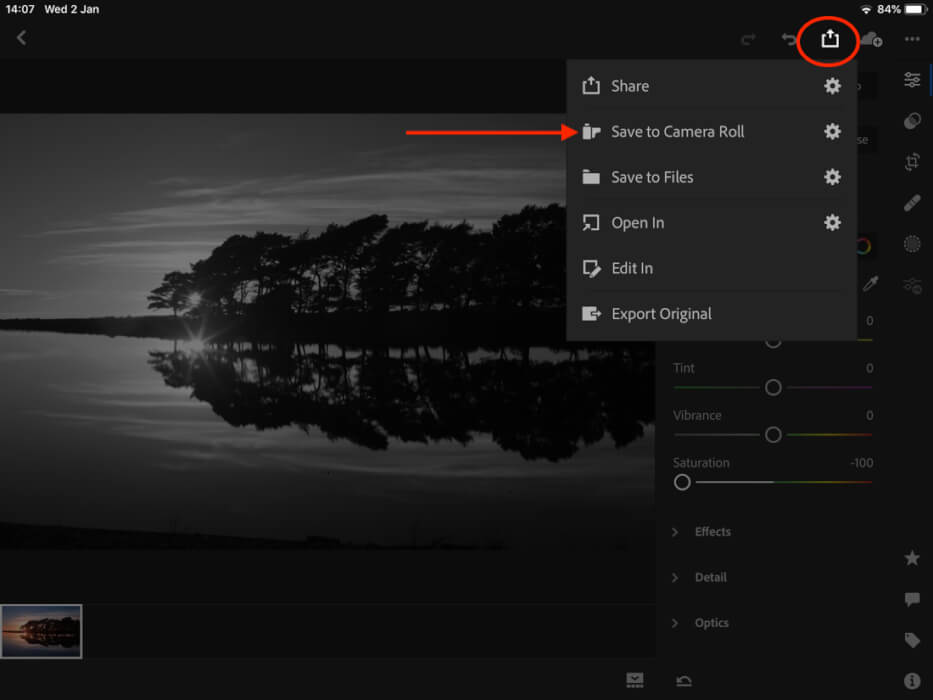
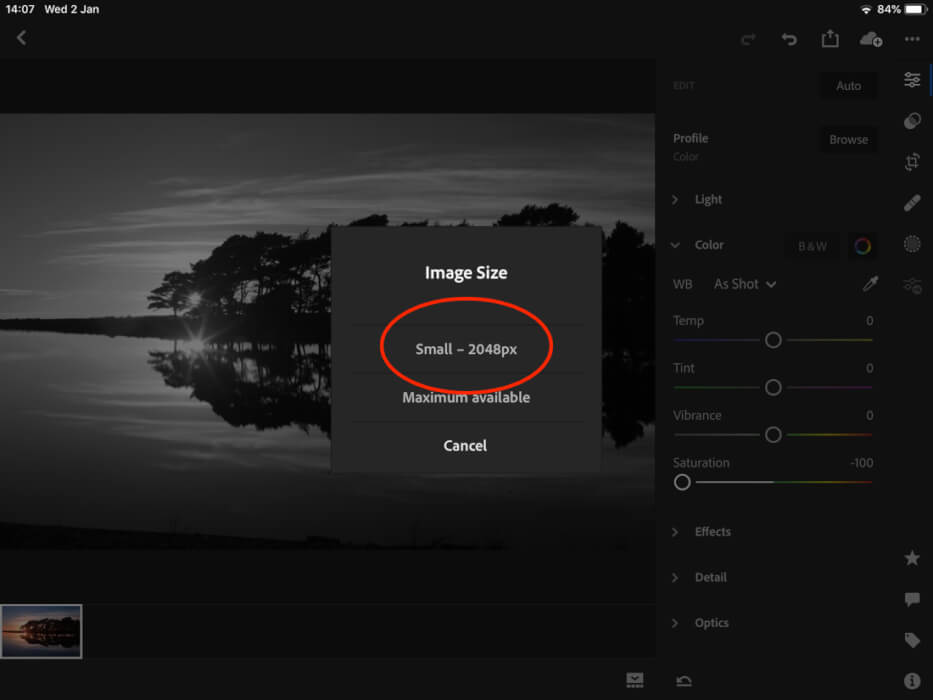
This now gives you the option to select which image size you want to export as.
The only problem is, it only allows two options. It would be a great feature if you could determine the file size on export.
Until this happens, I am choosing the Small size of 2048px.
After export, you should get the following message. It automatically saves them to an Album within the Photos App called Lightroom.
Again, it would be good to be able to determine the album they get saved to, but from what I can work out, you can’t.

4 – Viewing the edited photographs in the Photos App
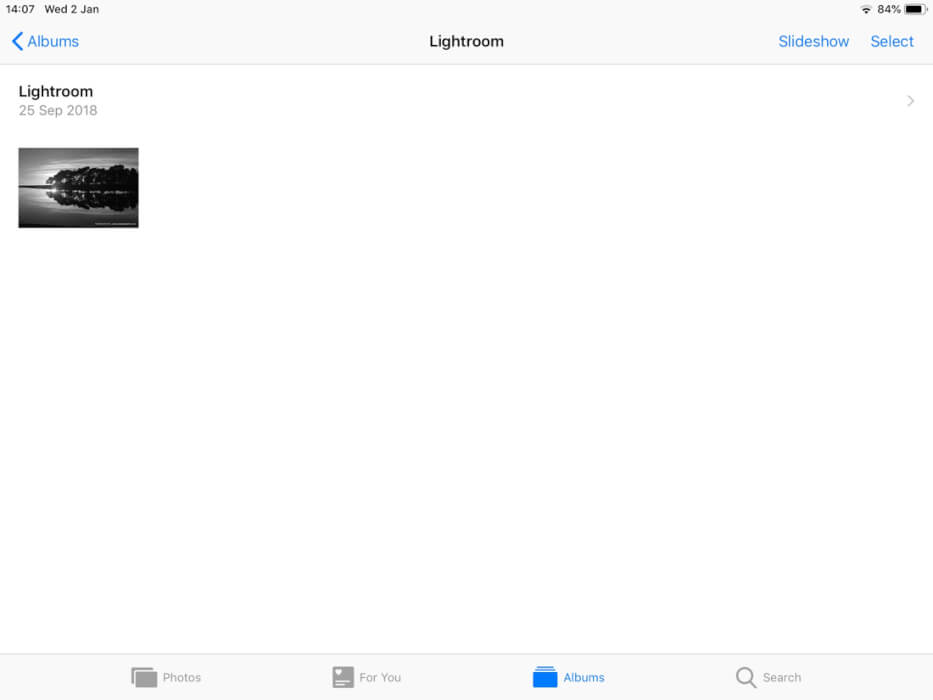
Here you can see a screenshot from the Photos app. I have found the Album called Lightroom, and you can see the exported image.
Getting photos from camera to Lightroom mobile on the iPad
I hope this tutorial has helped a little. If you can spot any errors or have a better way, please let me know. I am always looking to learn!
Thanks for reading, happy snapping!!


